Tuesday, October 2, 2018

Current Hair Care Routine

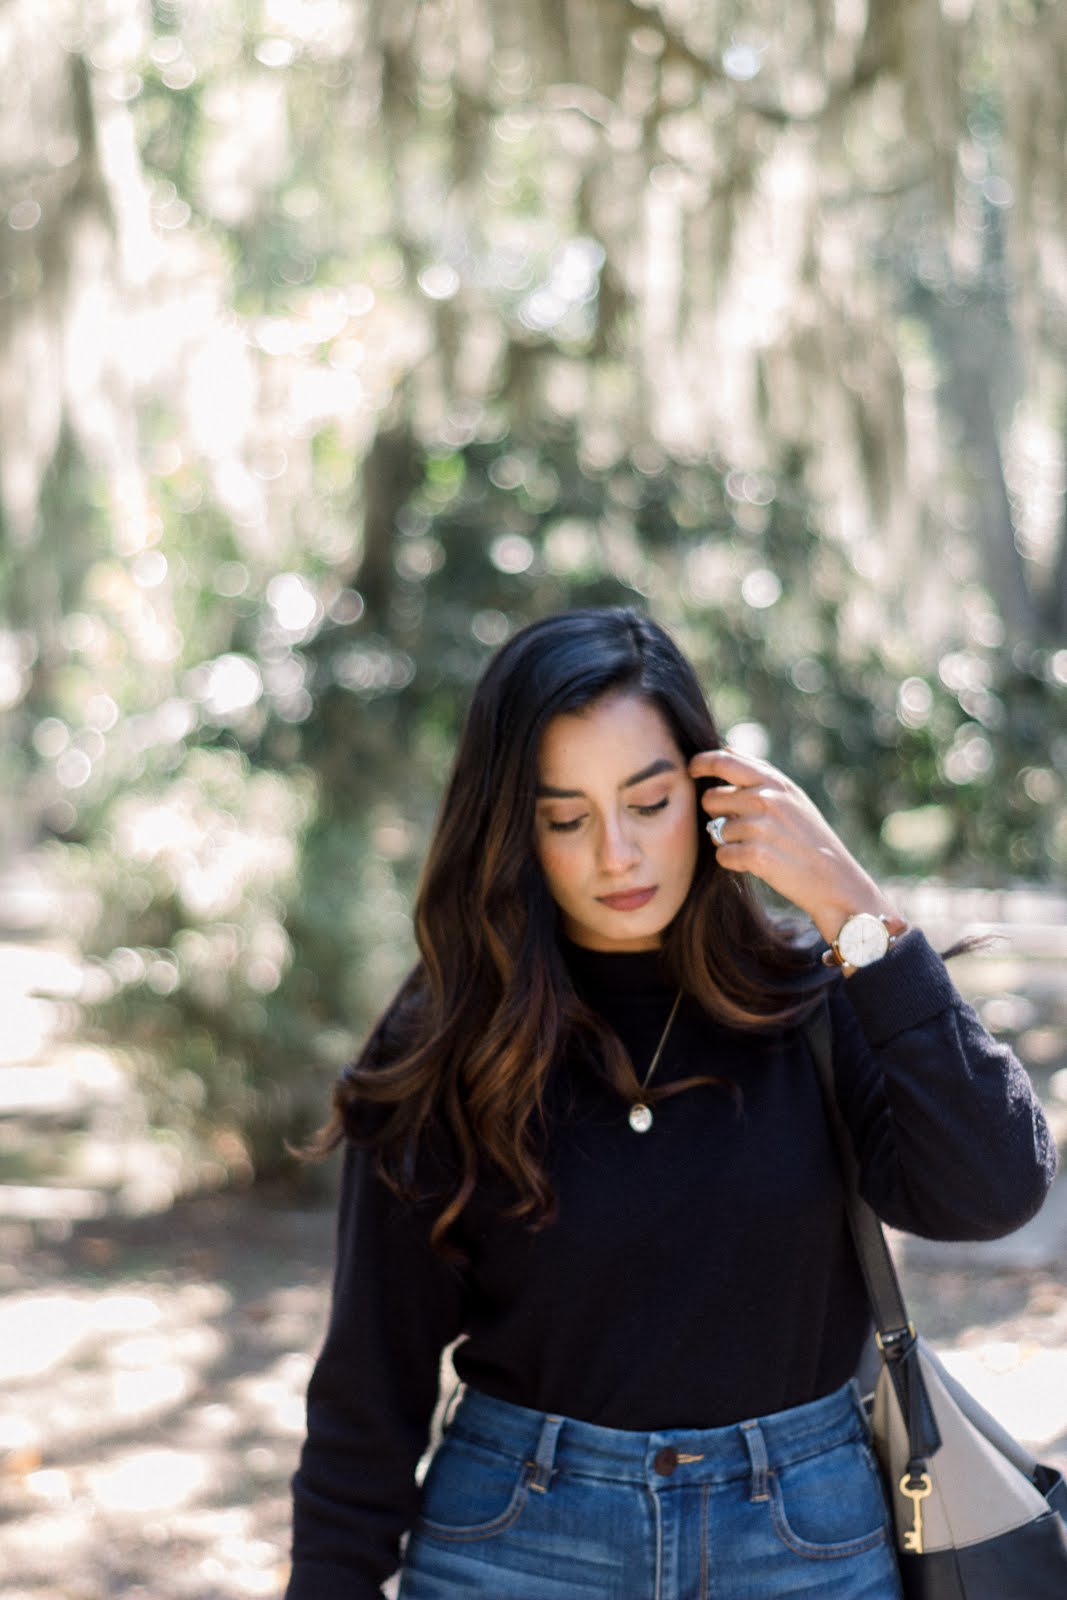
Today I'll be sharing my hair current hair care routine. It's pretty uncomplicated, seeing as I don't do much with my hair on a regular basis. Let's get into it:

ABOUT MY HAIR
I have moderately dense, black (or just very deep brown) hair that is quite sensitive to styling and dye. If you're at all familiar with hair types, I believe mine falls under the 1C category; it's mostly straight with a little wave to it, and holds curl relatively well without the use of hairspray. 
I was probably 12 or 13 when I started dyeing my hair, which included bleaching to lift the color out of it. I'll be 26 next month and I haven't dyed my hair in just over three years. Part of it was because I didn't feel like spending money that could be used elsewhere, the other reason was trying to have healthy hair again. I've also come to appreciate my dark hair, which for the longest time I thought was dull and flat. I keep heat styling to a minimum and always use a heat protectant when I do so. 


SHAMPOO & CONDITIONER
About a year ago, I switched to sulfate-free shampoo and conditioner just to see if there would be any improvement in my hair. So far, I've been experimenting with the OGX line of hair care, as they're all sulfate-free. Right now I'm using their Anti-Breakage Keratin Oil shampoo and their Nourishing Coconut Milk conditioner. I've also enjoyed using their Detoxifying Pomegranate & Ginger shampoo and the Bamboo Fiberfull shampoo and conditioner. I try to switch up the shampoos I use to keep my hair confused so the products are still effective. 

I try not to wash my hair more than twice a week. Once a week I add sea salt to my shampoo (equal parts) as an scalp exfoliant. I frequently use dry shampoo, so the salt really helps to clarify and lift all the extra gunk off of your scalp. I also find that my hair is noticeably more voluminous after doing this once a week. Salt is rough, so if you do this, just be careful and massage your scalp gently! 


ANTI-BREAKAGE SERUM
I'm about to talk about another OGX product, and no, this post is not sponsored! I'm just sharing what I do with my hair, and a lot of the products I like are from this brand. Since my hair is so prone to being brittle at the ends, I apply a dime-sized amount of OGX's Nourishing Coconut Milk Anti-Breakage Serum to the ends of my hair when its damp. I've been using this for a couple months and I still have a lot left. It's heavily scented, so if you don't like coconut, you could always opt for a different serum for your ends. 


Post-shower, I let my hair air-dry. I'm someone who showers at night, but I try not to sleep with damp hair – I used to do this all the time; now I'm not sure if the tousled waves and worth the breakage. Being gentle to my hair in the past few years has to be one of the best things I've done for it. I also love using homemade hair masks, and should probably do them more often. Maybe that should be a post for a later date. :)

Tuesday, September 11, 2018

Moody Color + Textures | Autumnal Decor Inspiration

Truth be told, I was never a huge decor person until maybe a year or two ago. My dorm room as a college freshman had a dry erase calendar and a gigantic beaded lime lizard above my bed – fin. It was a combination of not caring, and the known fact that I was only in this dorm for a short period of time. Decorating my room just seemed like an inconvenience – I was happy with the bare walls of a room that truly wasn't mine at all. 

Seven years into the future, I've come to appreciate the purpose of creating beauty in a living space – it's a reminder of order. A beautiful room, or even just a beautiful corner of a room, is so soothing. 

Like so many, I love fall. I've never officially decorated for this season before, so it's a first. I'm honestly not a fan of the orange and brown hues we see so much at this time of year, so I decided to pick up from shades which I love while still maintaining an autumnal color story. 

We're only just getting into fall, so what I have at the moment are items for my dining table. I played around with plums, red-orange, dusty mauve and gold. I love how they look against the wood of the table. I think they colors are true to fall despite not being traditional colors. In a way, this palette was inspired by what we tend to see in vampy fall makeup. 


The cats seem to really like the pears, so I had to temporarily remove them from the table. :( Are you guys decorating for fall yet? 


Wednesday, September 5, 2018

The Procrastinating Beauty Blogger Tag

I've always enjoyed reading tagged posts because I like learning about people. Since I myself have never done a beauty tag post on here, I thought this one from EmilyNoel83's blog (all the way back in 2013!) looked fun. :) I tag anyone with a beauty blog who wants to do this!


1. NAME A BEAUTY REGIME THAT YOU RARELY DO
I don't really style my hair much. I use dry shampoo, but no mousse, gels, pomades, etc. My hair is super sensitive to heat; I always notice split ends when I curl my hair, even though I always use heat protector on it. My knowledge of styling hair is extremely limited, too – I can curl it, straighten it, put it in a braid or a ponytail, and that's pretty much it. That being said, I do care about the overall health of my hair. I try to use homemade hair masks (when I feel up to it, haha), I avoid using shampoos and conditioners with sulfates, and I only use heat styling for special occasions. 

2. IS WASHING YOUR MAKEUP BRUSHES SOMETHING THAT YOU DO REGULARLY?
Yes and no – I wash my foundation brush pretty much every day, but I'm pretty lazy with my eyeshadow brushes and usually wipe them off with a tissue. :| 

3. HOW LONG WILL YOU LAST WITH CHIPPED NAIL POLISH? 
This is kind of a funny question because when I was in junior high, I liked the look of chipped nail polish. If I'm wearing a nude/neutral color, I think I can get away with having them chip for a few days (I just try to convince myself no one's looking at my nails!). If I have on a bolder shade, I usually end up taking everything off. 

4. HOW LONG WILL YOU PUT OFF BUYING/REPLACING A BEAUTY PRODUCT, EVEN IF YOU NEED IT?
It honestly depends on the product. My base makeup, such as foundation, primer and setting powder, are items which absolutely need to be replaced before I run out. Another thing would be brow powder or gel. Stuff like mascara I can typically go a few weeks without buying. It isn't until a formula has become unbearably dry and flaky on my lashes that I replace it – a new tube of mascara is always a wonderful thing. :)

5. WHAT IS YOUR WORST BEAUTY HABIT?
Picking at split ends and not drinking enough water. 

6. NAME SOMETING NON-BEAUTY RELATED THAT YOU PUT OFF DOING ALL THE TIME
The dishes. I really like to deep clean, vacuum, etc. but I hate doing the dishes, so my husband does them most of the time. 

7. WHEN GOING OUT, DO YOU LEAVE GETTING READY TILL THE LAST MINUTE?
No! I hate feeling rushed. I always try to plan my getting ready time accordingly. If needed, I could probably do my makeup in about 20 minutes, but I'd prefer not to. 

8. CAN YOU COMMIT TO SPENDING BANS?
I'm not an impulse buyer at all. I can usually stop myself from buying stuff on a whim if it's going to put a dent in my bank account. When I see something I want to buy that I don't need right away, I go home and think about it. If I can't take my mind off of said item, I plan for a good time (financially) to get it. 

9. HOW ORGANIZED IS YOUR MAKEUP AND NAIL POLISH COLLECTIONS?
Pretty organized! I have a specific place for everything. I try to put stuff back where they belong when I'm finished using them. I don't own a ton of nail polish, but what I do own is organized by color (I organize my closet like this as well). 

--------
OUTFIT DETAILS
Sweater | H&M 
Scarf | H&M
Watch | FOSSIL

Monday, August 27, 2018

REVIEW + TUTORIAL | Day-to-Night Feat. The Emily Edit - The Wants Palette


Oh my goodness. It's here, I have it – The Emily Edit, The Wants palette from EmilyNoel83! Though I'm not a longtime subscriber of Emily's (she's been on YouTube for almost 11 years), her channel quickly became a favorite of mine, next to Jessica Braun's. I was thrilled when Emily announced she would be releasing two palettes with Makeup Revolution – a brand that, in my opinion, has a bunch of great, affordable products. I picked up The Wants palette from my local Ulta on Sunday, and began playing with it when I got home.


The Wants palette (pictured above) retails at $20, and The Needs palette at $15. Emily came up with the ideas for both products; she hand-picked every single shade, which represent special moments and people in her life. If you're interested in hearing about the background story of both palettes, I highly recommend watching the reveal video she posted.  


I will admit that when I first saw the shades, I was a little intimidated. I'm an everyday neutrals girl, and tend to be color-shy. When I bought the palette, however,  I found myself drawn to hues I'd seldom use. My personal favorite, Eve Rose, is a delicate lilac with gold shimmer. Family is a rich matte plum shade which can easily replace black if you're looking for something a little different for definition. Corduroy, a strong forest green, makes a stunning liner shade. The shade pairings you can use are probably endless, and there's something for everyone and every season. These shadows are also buildable, so they'll work perfectly even if you want a sheer wash of color.

The palette measures 9" x 6". Not exactly a travel-friendly size, but you do get a huge mirror inside. 

I created a daytime look and an evening look in the photos below. They're super easy and the best part is that there's no need to start over when transitioning from day to night. :)


THE DAYTIME LOOK
1. Prime your lids with your favorite eyeshadow primer, or with dot of concealer on each lid. Blend with a brush or fingertip. (Optional: set the primer/concealer with loose powder).
2. For the lid, use Midwest. 
3. In the crease, take a fluffy brush to blend in Dues Paid. 
4. Using a contour brush, blend Apartment in the outer corner and halfway across my crease. Blend this shade along the bottom lash line.
5. With your middle fingertip, pat Top Story in the center of the lid, building up to desired intensity. 
6. Taking a fluffy angled brush, use Eve Rose in the inner corner, blending towards Top Story and stopping where the edge of your iris begins.
7. Finally, use Oh Heavens! to highlight the brow bone. Curl your lashes and coat top lashes with your favorite mascara (I used the Essence Lash Princess False Lash Effect Mascara). I also used a light coat of mascara at the center my bottom lashes. 


TRANSITIONING TO THE EVENING LOOK
1. Using a fingertip or a flat, dense brush, use Capricorn to pat in the center of your eyelid. Use the same shade to blend along the bottom lash line.
2. For the outer corner, take Dark & Early, blending in a V shape. Blend along upper lash line. Use this shade for the outer lower lash line, stopping where your iris begins. 

OPTIONAL: I'm not using falsies in these photos, but you could really amp up these looks with some beautiful, wispy lashes. I really like the Faux Mink line from Ardell. 

------

This is my first tutorial on here, so I hope everything was easy to follow! I'll definitely be creating more looks with this palette, so maybe I'll post some more tutorials if I'm happy with the outcome. :)

Tuesday, August 7, 2018

REVIEW | Wet N Wild MegaCushion Foundation


Last month, I went to the beach. Many people opt out of wearing makeup on days when they'll be by the shore, but I still prefer to wear makeup even during vacation. I just love makeup, guys. :) 

I wasn't willing to bring my Becca foundation (I'm the shade Bamboo) with me; it's expensive, and I'd be so upset if I left it behind or lost it. I also wanted to go for a foundation lighter in feel and in coverage, one that was portable and easy to use for touch-ups. I figured this would be the perfect time to try out a cushion foundation.

Thanks to Korean beauty, cushion foundations have made their way into the western market in the past two years or so. They're essentially a sponge saturated with foundation, often containing skincare benefits. Drugstore and high-end brands alike carry cushion them. Since I wasn't about making a pricey purchase, I went for the most affordable option in the drugstore: Wet N Wild's MegaCushion Foundation

PACKAGING 
Very travel-friendly. The foundation "cushion" is encased in a black plastic compact, 2.5" in. in width and 1" in. in height, making it easy to fit in the makeup bag I keep in my purse. It has two compartments: one for the sponge it comes with and one where the foundation sits. The bottom of the packaging is translucent, so you're able to see when you're running low on product. I really have no complaints about the technical design of the packaging, but I don't care for the label graphic – it makes this look like a product for children.  

SHADE RANGE
There are 8 shades in the MegaCushion line, which have warm, cool, and neutral undertones. I purchased the shade Honey Beige, described as a medium/tan shade with a warm undertone. I actually have an olive undertone, so this shade pulled a little red on me. It was, however, a pretty close match for my skin tone. 

CONSISTENCY + APPLICATION
The foundation is dispensed by pressing an applicator into a sponge, so the consistency is quite watery, but incredibly light. I chose not to use the applicator the foundation came with because of the size – I wanted a quick application and it was just too small of a sponge to do that. Instead, I used my Real Techniques Blending Sponge. The coverage is sheer to medium, but can be built to a fuller coverage. There is a scent to the product. Sometimes scented makeup can make me break out, but so far I've had no issues with it. 

FINISH
I'm not big on dewy foundations because my skin is on the oily side. But this had the most natural, luminous finish. It made my skin look healthy, glowing, and hydrated. It was also quite forgiving on any texture I had. Most importantly, my skin looked like skin, not makeup. I did need to set some areas of my face with powder (I used the Maybelline Fit Me! Loose Powder), but I used as little as I could get away with because I didn't want to take away from how pretty the finish was on its own.

WEAR TIME
Although I kept this foundation in my purse, I didn't touch up my face during the day. The longest I ever wore it was for just over 12 hours, using a mattifying primer underneath. This formula doesn't claim to be water resistant, so it did start to separate after I had been splashed/misted by ocean water. On other non-beach days, it held up well with a primer (I paired it with the Wet N Wild matte primer) for roughly 5-6 hours; past that time, there would be slight fading. Cushion foundations are lightweight and not meant to last long, hence why they're marketed to be good for touchups. 

FINAL THOUGHTS + WHO IS IT FOR?
For under $10, this foundation is really nice – I would gladly buy this again. I've been using it on-and-off since I purchased it, and every time I've been satisfied with the coverage, finish, and feel of it. The coverage was easily buildable even on my worst acne scars and hyperpigmentation and never looked cakey. What's disappointing is how quickly it gets used up. I read that you can flip over the sponge inside the compact to get leftover foundation out. 

Wet N Wild's MegaCushion Foundation is for someone who wants a natural looking, no-fuss foundation to even out their skin tone. I could see this working on all but excessively oily skin, and I would imagine it would be comfortable to wear for those with dry skin. If you're is sensitive to scented makeup, I would steer clear of this product because it is scented. 
-----
DISCLAIMER: This is not a sponsored post. I bought the product above with my own money. 

Friday, July 6, 2018

Lemon Poppy Seed Bread (Magnolia Table Cookbook)


I associate the flavor of lemons with my mom; growing up there was always some sort of lemon baked good in the house. It's been a number of years since I've come home from school and paired a slice (or two) of lemon loaf with a cup of tea, and this Lemon Poppy Seed Bread from the Magnolia Cookbook does not disappoint. It isn't an overly sweet dessert, making it perfect for just about any time of day. 

JOANNA GAINES' LEMON POPPY SEED BREAD 
Prep: 15 minutes | Cook: about 1 hour | Cool: 1 hour | Makes 8 servings 

INGREDIENTS
  • Vegetable oil spray
  • 2 1/2 cups all-purpose flour (I substituted with Bob's Red Mill 1-to-1 Gluten Free Baking Flour)
  • 1 tablespoon poppy seeds
  • 1 tablespoon baking powder
  • 1/2 teaspoon baking soda
  • 3/4 teaspoon kosher salt
  • 1 2/3 cups sugar
  • 2/3 cup milk
  • 1/2 cup vegetable oil (you can also use olive oil or grape seed oil)
  • 3 large eggs
  • 2 teaspoons grated lemon zest
  • 2 tablespoons fresh lemon juice
  • 1 teaspoon pure vanilla extract
LEMON DRIZZLE
  • 1 1/2 cups powdered sugar
  • 1 tablespoon grated lemon zest 
  • 2 tablespoons fresh lemon juice, or as needed
DIRECTIONS

       1. Preheat oven to 350℉. Spray a 9 x 5-inch loaf pan with vegetable oil; bottom and sides should be coated thoroughly.
       2. In a medium bowl, whisk dry ingredients together; flour, poppy seeds, baking powder, baking soda, and salt.
       3. In a large bowl, combine the sugar, milk, oil, eggs, lemon zest, lemon juice, and vanilla. Whisk until blended.
       4. Add the dry ingredients to the liquid, a little at a time. Do not overmix. 
       5. Scrape the batter into the loaf pan. Bake until a tester inserted in the center comes out clean, about 1 hour*.
       6. Let cool for 10-15 minutes in the pan. Remove and set on plate or cooling rack until cooled completely. 

FOR THE LEMON DRIZZLE
Combine sugar and lemon zest in a medium bowl and stir. Add 1 tablespoon water and lemon juice.**
Pour lemon drizzle over warm or room-temperature bread.
------
*May need less time depending on your oven. I recommend checking on the loaf at around the 45-minute mark to see how much more time it needs, if any. 
**Adjust the amount of lemon juice until you have a pourable icing; it should be an almost honey-like consistency and not overly runny.  
-------
This recipe is taken from The Magnolia Cookbook. 
DISCLAIMER: This is not a sponsored post. 

Monday, July 2, 2018

MY TOP 5 DRUGSTORE BRANDS | BEAUTY


Holy smokes, it's been too long since I last posted! I'm back, so I'm just going to jump right into things:

If you're like me, the drugstore is where your search for makeup began. I greatly appreciate high-end makeup, but it's a rarity for me to buy it regularly because it's expensive. In no particular rank, I'll be talking about my top 5 drugstore brands, why I love them, and what my favorite products are.

1. MAYBELLINE
Maybelline is iconic – it's hard not to picture the lime green and bubblegum pink packaging of their Great Lash mascara that hit the market almost 50 years ago. They're pretty consistent with the quality of their products, and are generally affordable, considering that drugstore brands have hiked up their prices in the past couple years. Maybelline's Fit Me! line has a faithful following, and their lipsticks are the reason I seldom purchase high-end alternatives.

Here are some of my favorites from Maybelline:
- COLOR SENSATIONAL LIPSTICK (MATTE + SATIN FINISHES)


2. WET N WILD
Before the rise of the Beauty Guru era, not many people talked about Wet N Wild; I think this brand was pushed to the side because people were skeptical. Their products were cheap, and sometimes cheap can leave people wondering whether a product is mediocre. In the past couple years, however, WNW has proven that low cost doesn't need to sacrifice quality. They've put out some incredible products, and still managed to keep their items extremely affordable. 

Here are some of my favorites from Wet N Wild:

3. NYX COSMETICS
NYX is one of the bolder, more modern-feeling brands at the drugstore. They've always delivered affordable, on-trend products to beauty enthusiasts, and they truly value their fanbase. They're innovative, too – I have yet to hear about a monotonous release from NYX. Even their most basic products, such as their butter glosses, feel contemporary. 

Here are some of my (many!) favorites from NYX:


4. MAKEUP REVOLUTION
Makeup Revolution has gained much of its following for being penned a "dupe brand", but who's complaining? While I''d love to see more original ideas from this brand, I do appreciate that their products are super affordable alternatives for high-end makeup. Makeup Revolution is a solid brand to experiment with if you're new to makeup, because the quality of the stuff I've tried is very promising. 

Here are some of my favorites from Makeup Revolution:


5. L'OREAL
L'Oreal is another classic drugstore brand that has been developing tried-and-true products for decades (the company is only a few years older than Maybelline). While L'Oreal does make skincare and haircare, I think where they shine the most is in their cosmetics. Their collections seem to be well thought out and their formulas feel luxe. 

Here are some of my favorites from L'Oreal:

-----
DISCLAIMER: This post is not sponsored by any brands mentioned above. I bought all products mentioned with my own money.

Monday, June 4, 2018

Making Kombucha at Home

Freshly jarred, raw Kombucha – my first batch ever! 


Kombucha is actually just fermented black tea – and it's surprisingly easy to make. There are many ways to brew it at home, but this is just the technique I learned from a friend. Making your own Kombucha takes a little patience, but it's a rewarding process because you no longer need to drink the store-bought stuff!

Let's get into it!

WHAT YOU'LL NEED

TOOLS & SUPPLIES:
  • (2) Gallon Mason Jars (preferably wide mouth) 
  • (1) Large Pot (for boiling the tea)
  • (1) Cloth for covering one mason jar; make sure it's a thin, breathable fabric.
  • (1) Mesh Strainer
  • (4) Quart Mason Jars (for storing finished Kombucha)
INGREDIENTS
  • 6 Cups Bottled/Filtered Water 
  • 6 Organic Tea Bags; I use 3 Oolong and 3 Black Tea (I use Prince of Peace)
  • I Cup Organic Cane Sugar
  • 2-3 Cups Bottled/Filtered Water
  • 1-2 Cups Raw Kombucha (store-bought is fine)
  • 1-2 Kombucha SCOBYs (if you don't have one, we'll get to that later)
  • OPTIONAL - Organic Fruit or Food Grade Essential Oils for flavoring

HOW DO I OBTAIN A SCOBY?
You have two options for this: You can, a) Ask a friend for one, or b) grow a SCOBY! Please note that growing a new SCOBY will take roughly 1-4 weeks. 

DIRECTIONS

       1. Bring 6 cups of filtered/bottled water to a boil in a large pot.
       2. Once water is boiled, turn off the stove and add the 6 organic tea bags (3 Black, 3 Oolong).
       3. Brew tea for 15 minutes; remove tea bags.
       4. Add 1 cup organic cane sugar to the tea. Stir occasionally until dissolved.
       5. Pour tea and 2-3 cups filtered water into one of the two gallon mason jars. Let cool.
       6. Once cooled, add 1-2 cups of raw Kombucha to the mason jar. Then, add the SCOBY(s).
       7. Cover mason jar with a clean, breathable cloth; secure with an elastic band.  
       8. Let tea ferment anywhere between 9-21 days in a dark, warm place, away from perishable foods.

Do not flavor the tea while it is fermenting. That's an added fun part for post-fermentation. :) 

AFTER FERMENTATION

       1. Remove the SCOBYs from the mason jar with your hands. Do not use metal utensils – the Kombucha will react badly.
       2. Place the SCOBYs and 2 cups of fresh Kombucha into the unused gallon mason jar. Cover and keep in a dark, warm place.
       3. Pour the remaining Kombucha over a strainer into quart sized mason jars.

OPTIONAL: If you decide to flavor your Kombucha, let it ferment for an additional 1-4 days. You can use organic food grade essential oils. I use doTERRA, and one drop of each flavor is plenty (no I am not a doTERRA consultant, haha). I also like to add slices of organic fruit to a freshly brewed batch. 

Some of my favorite flavor combinations include pear, grapefruit, grapefruit + ginger, strawberries, and strawberries + peaches. Given the sensitive nature of Kombucha, it's best to stick to organic fruits and high quality essential oils. This is a great list for flavor inspiration.

FINALLY, enjoy your Kombucha! If you would rather save it for later, seal the jars and keep them in a dark, warm place. Kombucha will continue fermenting as long as its warm. To stop fermentation, place the jars in the fridge. 

WHAT NEXT?
If this is your first time brewing Kombucha, I would advise making another batch to mature your SCOBYs. Remember to save at least 1-2 cups of Kombucha from your previous batch for your next one (use this in place of the store-bought brew). Once that has fermented, you can go on to make a SCOBY Hotel.

I LET MY KOMBUCHA FERMENT FOR TOO LONG! WHAT SHOULD I DO?
Don't panic, and don't toss it! It's easy to forget about something when it's sitting in the dark for days on end. The good news is that you can use prolonged fermentation to make Kombucha vinegar.
-------
This recipe is based purely on handwritten notes I jotted down when learning to make Komucha. Please let me know if I am missing any important information. Happy brewing! :)

DISCLAIMER: This is not a sponsored post. 

Sunday, May 20, 2018

SHOP LOCAL | The Small Town Charm of Paisley & Co.


I live in a college town in rural Pennsylvania. There isn't always a lot to do here, but there's no denying its charm, and I love the independent vendors lined up on Main Street. One store in particular that I've spent countless hours in (over time, not all at once!) is Paisley & Company

Paisley & Company is a fragrance bar and bath boutique (similar to LUSH) which opened in 2003*. Their products, which include skincare, fragrances, shampoo, and more, are homemade with natural ingredients and are cruelty free. What's unique about this boutique is that you can create your own scent and turn it into virtually any product they make. If this sounds intimidating, it really isn't – there's always someone there to help you create your own scent, and the employees are extremely helpful even if you're not 100% sure what you want.

Some of my favorite products from Paisley are their fragrance oils and their hand and body lotion, pictured above. These are the fragrance oils and lotions I own:

FRAGRANCE OILS
Although I primarily use Paisley's fragrance oils as perfume, they're versatile and that's why I love them. You can use them in the shower or bath, and they're also great for masking odors around your house/apartment. They're heavily scented, so a little goes a long way. If you create your own fragrance, you'll be given you a memo upon purchase with your concoction and ratio used, so you don't forget. 

VICTORIA ROSE
Victoria Rose is a sweet, bright, and floral scent. I'm taking whiffs of it as I write, and it kind of reminds me of a box or rose and lemon turkish delight. I think it was one of the first of their fragrance oils I bought. It's on the stronger side, so you really have to appreciate roses to like this scent.

NAG CHAMPA & COCONUT
Self-explanatory; I would say this scent is sweet, warm, and slightly earthy. I love anything coconut, but the blend of that with nag champa lends itself to memory more than if it were just coconut. 

SPRING ROMANCE
This fragrance, pictured below, is one that I created! I know the name is a little twee. Long story short, my creation's namesake is a looseleaf tea blend that I got a few days beforehand. I wanted to make something clean and floral balanced with a little warmth and sweetness. There are equal parts Jasmine, Sensual Amber, Bamboo, and Coconut. Seeing as its the only scent I've created at Paisley, I'm pretty proud of it. I have a few more fragrance ideas, so I need to go in there are make more sometime soon.


HAND & BODY LOTION
I have two of these and keep one in my purse at all times. The formula isn't overly rich or greasy, and keeps my hands smooth and moisturized for a long time. I've gifted their hand and body lotion to mother-in-law and sister-in-law, and they both really enjoyed them. 

SEA SALT & PEONY
This pre-made lotion has a truly a unique fragrance. It's gorgeously "cold" and mildly floral. I would almost consider it to be wintry. It smells like roaming a rocky New England beach in November with a bouquet of lush peonies on the breeze. I sound like I'm getting carried away, but it's because this scent is beautiful. 

SHEA & COCONUT
While I don't think this lotion contains shea butter, it is obviously scented as such. I love this fragrance because it doesn't feel too summery, despite the coconut. There's a muskiness to it which tones down the coconut to be more wearable year-round. 

This post is really just scratching the surface of how much Paisley & Co. offer. Even if you're not into boutiques like this, it's a cool experience because of how interactive it is, and is a place that takes itself and its clients seriously. If you ever find yourself in or near Kutztown, Pennsylvania, make it a priority to spend some time at this little shop.

-----
*Paisley & Co. only ships within the U.S.

DISCLAIMER: This post is not sponsored by Paisley & Co. I bought all products mentioned with my own money.

Thursday, May 17, 2018

MORNING + NIGHT SKINCARE ROUTINE


The last time I had great skin was when I was 13. Not long before that, I remember hearing the word "acne" and not even knowing what it was. It's pretty strange to think about, seeing that acne has been a constant struggle for me for over a decade. If anything good can come out of having far-from-perfect skin, it's knowing that I need to take care of it!

I have oily/combination skin which is prone to cystic acne (those really painful zits that sit under your skin for forever). I also have a lot of post-inflammatory hyperpigmentation. If I have anything going for my skin, it's that it's relatively smooth. My main concerns are acne and skin discoloration. 

I try to keep my skincare routine simple because skincare is expensive; it involves a lot of trial and error to find something that works for each person. Below is a list of products I currently have and how I use them:

MORNING ROUTINE
I don't actually wash my face in the morning. Until a few months ago, never in my life did I consider foregoing exfoliators and cleansers upon waking up. I'm so glad I did, though! I've found that stripping my face of its natural oils, especially when I wake up, can cause inflammation and irritation – this can also make my breakouts worse when I am dealing with an acne flare up.

What I do instead is spritz my face with rose water from Pearlessence (I got mine at TJ Maxx) and let my skin drink it up. If I wake up oilier than usual, I use a cotton makeup round with Garnier's Micellar Cleansing Water and gently blot my face to get rid of some of the oil. 

I follow up with CeraVe's Daily Moisturizing Lotion and wait at least 10-15 minutes before applying makeup. This moisturizer is one that I think would work well for a variety of skin types. My husband, who has incredibly dry skin, uses it as well and really likes it. 

NIGHTLY ROUTINE
Going to bed with makeup on is one of the worst things you can do to your skin. I wear makeup pretty much every day, so it's a must for me to make sure 100% of that stuff is removed before heading to bed. 

To remove my makeup, I use the Garnier micellar water, mentioned in my morning routine. Once I've done that, I go in with my Foaming Facial Cleanser from CeraVe and massage it into my skin for a few seconds before rinsing it off. I then let my face air dry and moisturize with CeraVe's Daily Moisturizing Lotion, and spritz my face with rose water. 

#WHENEVERIWANT
For a long time, I used to think that face masks were an occasional treat for my skin. So, I just didn't use them all that often. One day when I was binge watching Lisa Eldridge videos, she revealed when she uses face masks  – whenever she wants. If Lisa can do that, I can do that as well, right? Done. The bottom line is, if your skin is in dire need of a face mask, use one. I've regularly been alternating face masks about 3 times a week, give or take a day or two. 

I have a number of face masks, but the ones I keep coming back to are Pearlessence's Turmeric & Honey Reviving Mask and their Aloe & Charcoal Detoxifying Mask (both available at TJ Maxx). I also love the Formula 10.0.6 Deep Down Detox Ultra Cleansing Mud Mask

WHAT I'M TRYING TO INCORPORATE
SUNSCREEN
I'm not one to spend much time in the sun, but SPF is definitely a worthwhile product to include in my regime. My skin is naturally tan, which gives me more protection from sun damage than someone with fair skin, but no one has complete immunity from the sun's rays.

SERUMS
Specifically Burt's Bee's Brightening Skin Perfecting Serum. I'm currently going through an acne flare up, and I know that once my skin has cleared, I'll be left with some really nice discoloration :(. I'm hoping that using this will speed up the fading process.

-----

DISCLAIMER: Skincare is something that is going to change for me over time. I don't use the same products I used a few years ago. Everyone's skin has different needs, and what may work for me, may not work for you! The list above is just what I do with my skin, which seems to be helping reduce problems for the majority of the time. This is not a sponsored post; I bought all products mentioned in this post with my own money.
© Threads + Blush. Design by FCD.